If you’ve ever felt the stress of creating social media content on the fly, you’re not alone. It’s a messy, inefficient process. One day you’re full of ideas, and the next you’re staring at a blank screen, trying to come up with something—anything—to post. This daily grind leads to burnout, inconsistent content, and a lack of real results.
But what if you could eliminate that stress for good? What if you could create a month’s worth of high-quality content in just a few dedicated hours?
That’s the power of content batching. It’s a strategic process where you group similar tasks together and complete them all at once. This isn’t about working harder; it’s about working smarter.
By creating a repeatable system, you can save time, improve the quality of your content, and show up consistently for your audience. In this guide, we’ll walk you through a simple 5-step system to batch your social media content so you can stop stressing and start growing.
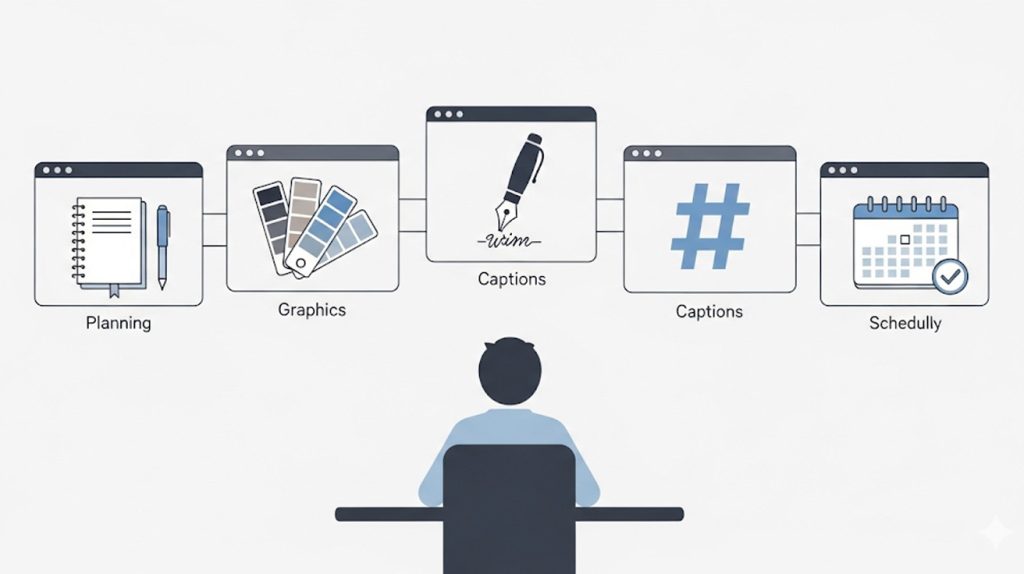
Step 1: Plan 📝
The foundation of any good content batching system is a solid plan. You can’t create a month’s worth of content in one day if you don’t know what you’re creating. This is where you get clear on your goals and your topics for the month.
- Define Your Goals: Before you even think about content, ask yourself, “What do I want to achieve this month?” Are you focused on growing your email list, increasing sales of a specific product, or boosting your overall engagement? Having a clear goal for the month will dictate the type of content you create. For example, if your goal is to grow your email list, your content should revolve around topics that lead to a valuable, free resource.
- Choose Your Content Themes: Once you have a goal, break it down into four or five core content themes for the month. This makes it easy to stay on track. For a marketing coach, this might look like:
- Reels strategy
- Content ideas
- Social media analytics
- Client case studies
- Outline Your Content: Now, create a simple outline for each piece of content you plan to create. You don’t need to write the full caption yet. Just write down the main points you want to cover. This is the blueprint for the rest of your batching session. It will save you from getting stuck later on and ensure your content is cohesive and on-brand.
Step 2: Graphics 🎨
This is the most visual and creative part of the batching process. Instead of creating a graphic for each post as you go, you’re going to create them all at once. This allows you to maintain a consistent visual style and use your creative energy in a focused, uninterrupted burst.
- Gather Your Assets: Before you start designing, make sure you have all the photos, videos, brand colors, fonts, and logos you need. Having everything in one folder will save you a ton of time.
- Batch by Format: The key to efficiency is to work in batches. If you’re creating Reels, film all of them in one go. If you’re making carousels, design all the title slides first, then all the content slides, and then all the calls to action. This “assembly line” approach is much faster than switching between different tasks.
- Create Templates: Use a tool like Canva to create reusable templates for your posts. This is a massive time-saver. You can create a template for your Reels covers, your carousel title pages, and your single-image quote graphics. Once the templates are done, all you have to do is drop in new text and images for each new post.
Step 3: Caption ✍️
With your graphics and videos ready to go, you can now dedicate your time and focus to writing all your captions at once. This is a huge time-saver because it allows you to stay in a creative flow without the constant interruption of switching between a visual and a text-based task.
- Write with a Purpose: Remember the goals you set in Step 1. Every caption should serve that purpose. Write your headline first to grab attention, then provide value in the body of the caption, and end with a clear call to action.
- Batch by Theme: Write all the captions for one theme at a time. For example, if you’re writing captions for your “Reels strategy” theme, write all four or five of them in one sitting. This helps you maintain a consistent tone and message across all related posts.
- Use a Simple Document: Don’t worry about putting the captions directly into a scheduling tool yet. Just write them all in a simple document (like Google Docs or a Notes app). This makes it easy to review and edit them all in one place.
Step 4: Hashtag 🔍
This is a critical step that many people rush, but when you batch it, you can be much more strategic. Hashtags are your discovery engine, and a few minutes of smart research can get your content in front of thousands of new people.
- Research in Bulk: Instead of researching hashtags for every single post, do all your research at once. Find 10-15 relevant hashtag sets for each of your content themes.
- Create Your Hashtag Sets: Group your hashtags together into sets based on your themes. For example, you might have a set for “Instagram growth tips,” another for “small business marketing,” and another for “content creation.”
- Save Them for Later: Store these hashtag sets in a simple document or note on your phone. This way, you can just copy and paste them into your posts when you’re ready to publish. This simple trick saves you from having to do new research for every single post.
Step 5: Review & Publish ✅
This is the final, and most satisfying, step of the batching process. You’ve done all the heavy lifting, and now it’s time to put your plan into action. This is where you bring all the pieces together and schedule your content to go live.
- The Final Review: Before you start scheduling, read through everything you’ve created. Read your captions out loud to make sure they sound conversational. Check that your calls to action are clear and consistent. This final review catches any typos and ensures your content flows logically.
- The Publish Schedule: Use a scheduling tool to schedule all of your posts for the month. This is the moment you give yourself back hours of time. You no longer have to worry about what to post each day. The system is on autopilot, freeing you up to focus on other parts of your business, like engaging with your community, responding to DMs, or working with clients.
- The Set-It-and-Forget-It Freedom: Once your content is scheduled, you can “set it and forget it.” But that doesn’t mean you can disappear! The beauty of content batching is that it gives you more time to be present on the platform. You can now use your daily time to engage with your audience, reply to comments, and build real connections—which are the true drivers of growth.
Conclusion: Stop Stressing and Start Growing
The daily content creation grind is a surefire way to burn out. But by adopting a simple 5-step batching system, you can transform your social media strategy from a stressful chore into a powerful, efficient engine for growth.
By planning your content in advance, creating your graphics and captions in a focused session, and scheduling it all at once, you’ll not only save countless hours but also produce higher-quality, more consistent content. The key is to work smarter, not harder.
The true freedom of content batching isn’t just about saving time; it’s about giving you the mental space to be present. You’re no longer scrambling to figure out what to post. Instead, you can use your time to do the things that truly matter: engage with your community, respond to comments and DMs, and build those crucial one-on-one connections that turn followers into fans and customers.
Ready to get started? Comment “CALENDAR” below, and I’ll send you a free content calendar template to help you plan your first month of batched content.